How to do Intarsia
<--- Previous Step
1. Design your pattern

You can purchase a pattern from almost anyplace that sells scroll saw products. You can find links to a few my favorite places to buy from on my Links page. You can also design your own patters from a sketch or line drawing (coloring books provide great line drawings). You can also use any graphics editor, such as PhotoShop, to create patterns from almost any graphic or image.
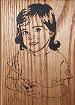
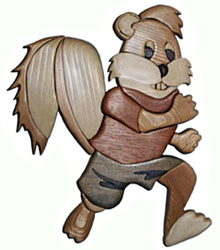
The project I'm using in this example is a comic style squirrel that is based off of a royalty free .gif image but modified for simplicity.
2. Selecting wood
Once you have your pattern selected, it's time to select the wood that you'll use. Pick a different type of wood to represent each different color of your project. To preserve the natural wood look of your project, try not to use stains or dyes. Some people like to work with softer woods, such as pine and cedar. They are much easier to cut, shape, and sand. But, it's also very easy to put indentations in them when you clamp them to glue them to the backing board. Harder woods, such as walnut are harder to cut and shape but won't indent when clamped. Ultimately, the selection is up to you. Intarsia is as much an art form as it is a craft. Experiment with different woods to see what you like to work with the most. One idea is to create a project that uses squares of as many different types of wood as you can and label each piece of wood (perhaps with a wood burning tool). That way you can see what each type of wood will look like when finish is applied.
For this project, I used cedar sap wood for the white, cedar for the fur, spanish cedar for the shirt, and walnut for the black.
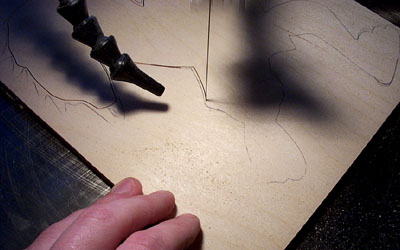
3. Cut out the pieces
Attach pieces of the pattern to your wood using a spray on temporary glue then cover it with clear packing tape. This not only help to hold the pattern down but also acts as a blade lubricant and helps prevent wood burns.
Another option would be to place a piece of carbon paper between the pattern and the wood and then trace the lines of the pattern onto the wood.
Cut each piece out with a scroll saw. Sand off any rough edges. Test each of the pieces as they are cut to make sure that they fit together ok. If they don't fit just right then you'll have to decide whither they can be fixed during the shaping and sanding process or if it will need to be re-cut.
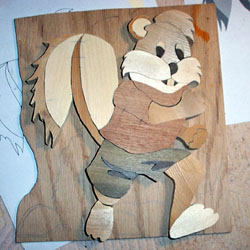
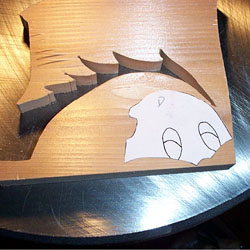
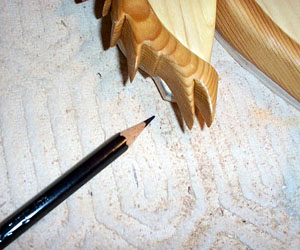
Here is my project with all of the pieces cut out but not yet shaped or sanded.
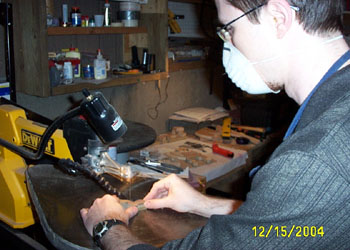
4. Shaping the pattern
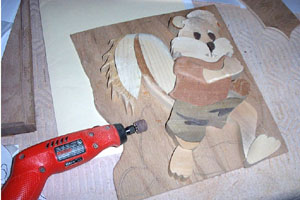
I use a hand held rotary tool with rechargeable batteries to shape and round the corners and edges. This can also be done with files, a small router, and even with rough sand paper. Most 'intarsians' like to use a horizontal drum sander for shaping.
You can use double face carpet tape to temporarily 'glue' pieces together for shaping. For example, you could put all of the face pieces together and tape them to a piece of 1/4" plywood as a temporary backing. Then, you could shape and sand the face as one larger piece. This helps to make the pieces 'flow' together better and look more natural when finished.
5. Sanding
Once you have all of the pieces cut out and shaped the way you want them, sand each piece using rough (80 grit) sandpaper to remove any blade marks or other scratches or indentations in the wood. Continue sanding using a medium (120-180 grit) sandpaper to remove the scratches made from the rough sandpaper. Finally, sand using a fine (220-320 grit) sandpaper for a smooth finish.
I use a thick fingernail file to help get into those hard to reach places. You can also fold your sandpaper to make it more sturdy to get into tight angles. Another option is to fold your sandpaper around a firmer object to get the shape you need. These techniques reduce sanding time considerably.
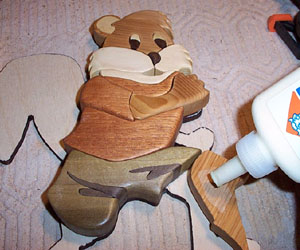
6. Finishing
Apply a small piece of masking tape to the back of each piece so that you don't get finish where you want to put wood glue later on. This will help the glue to soak into the wood for a better hold.
Apply 3 coats of finish, allowing each coat to dry overnight. I use Barkleys wipe on fishing gel. After the third coat I spray on a clear coat finish to seal it.
7. Create a Backing
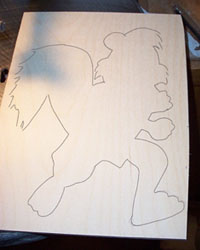
Lay out your project on a piece of 1/4" plywood and trace around it with a pencil. Be careful not to move any of the pieces as you're tracing. You can use some of the carpet tape to hold them down if you wish.
Once you have the project traced onto the backing, cut it out with a scroll saw. I like to cuy my backing slightly smaller than the outline so that the project hangs over the edges a little bit to help hide the backing.
Before glueing, place the project pieces onto the baking to make sure it is cut out properly. Mark any visible edges and them trim them off with the scroll saw.
8. Glueing
Glue the pieces onto the backing, one section at a time, starting with the larger pieces that are more toward the center of the project. This becomes much more important on larger project as these pieces will be used to help hold the other pieces in place. Apply a small amount of wood glue onto the back of each piece and spread it around to create a thin layer. Be careful not to get too much glue too close to the edges or it will squirt out the side of the project.
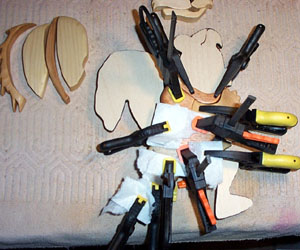
Lightly clamp the pieces in place and leave to dry overnight. You may want to use small pieces of paper towel between the wood and the clamps to help keep the clamps from making indentations in the soft wood.
Next Step --->
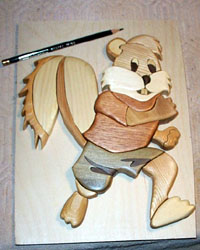
9. Voila (Wall-aah)
As in, you put in on a wall and people go "Ahhhh".